
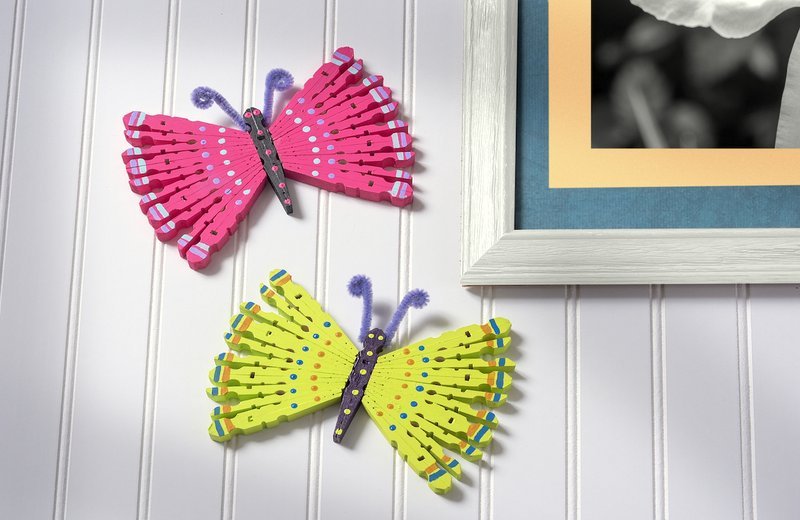
A clothespin butterfly. One evening, plus the dry time. About $5 in supplies. That’s the shape of this project: small enough to finish on a weekend, fiddly enough that you’ll want to set the glue down and walk away between steps.
I’d been meaning to do something with wooden clothespins since a bag of them sat in the bottom of a drawer for months. I picked the butterfly shape because it’s the one that gives a clothespin a reason to be a decoration rather than a kitchen tool. Two finished butterflies came out of the bag of thirty pins. One of them ended up on the wall above the workbench. The other is waiting for me to decide where it lives.
The whole build runs in four movements: take the pins apart, lay them out, glue the body and wings, then paint and add the finishing touches. I’ll walk through each one, and I’ll tell you where I went wrong so you don’t have to find it out the hard way.
What you’ll need
The full list cost me $5. That’s the only number I can promise. Everything else varies with what’s in your paint drawer and what the shop charges for pipe cleaners.
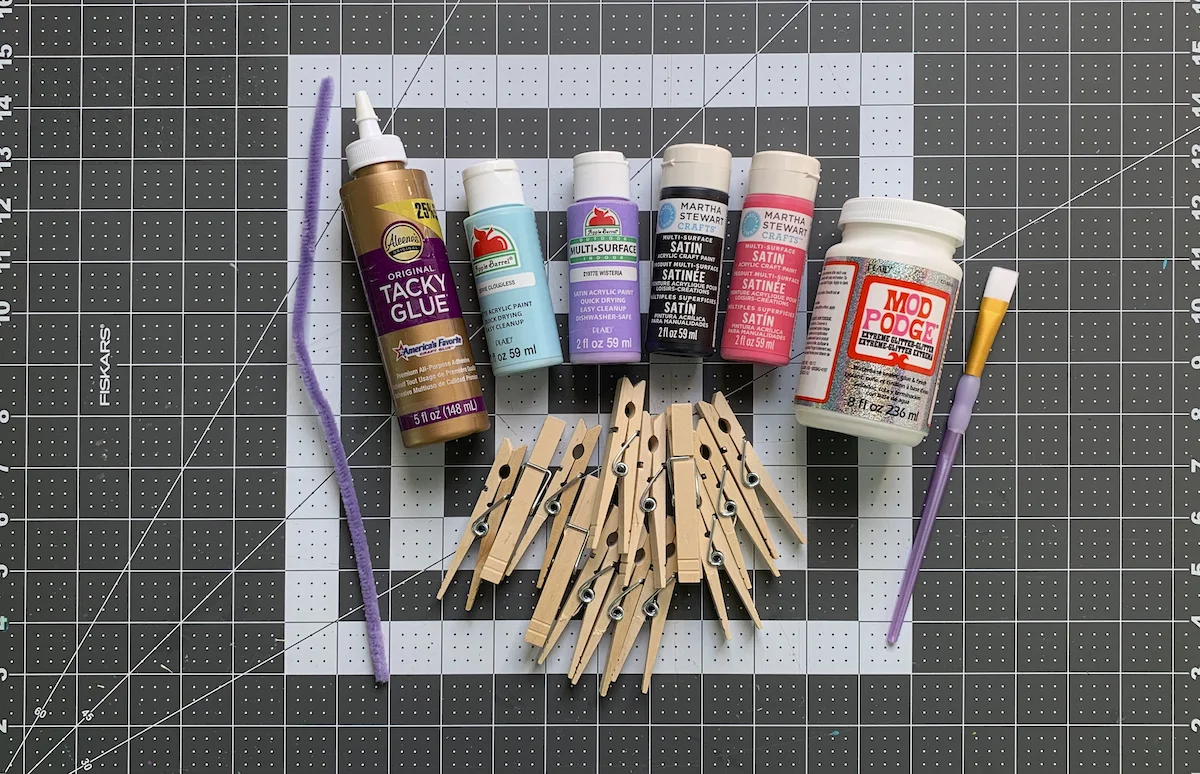
- 30 wooden clothespins (15 per butterfly)
- Acrylic craft paint — I used four colors across the two butterflies
- Craft glue, a decent bottle of it
- Pipe cleaners for the antennae
- Paintbrushes, one flat and one small enough for dots and accents
- Scissors
- Optional: glitter Mod Podge for a shimmery wash, and googly eyes if you want the faces to be a bit less serious
The Mod Podge is genuinely optional. I left mine off both butterflies and they look fine without it. Buy it only if the sparkle is what you’re after.
Take the pins apart first
This is the step everyone rushes and everyone regrets. The clothespin’s spring is what holds the two halves together, and you need to get it out of 15 pins per butterfly before anything else.
Twist the two halves so one side pops open. The spring slides out of the first half. Then the other half comes free and you pull the spring out of it too. Do all 15 pins for one butterfly before you move on — it’s easier to keep the count straight while your hands are still in the rhythm.
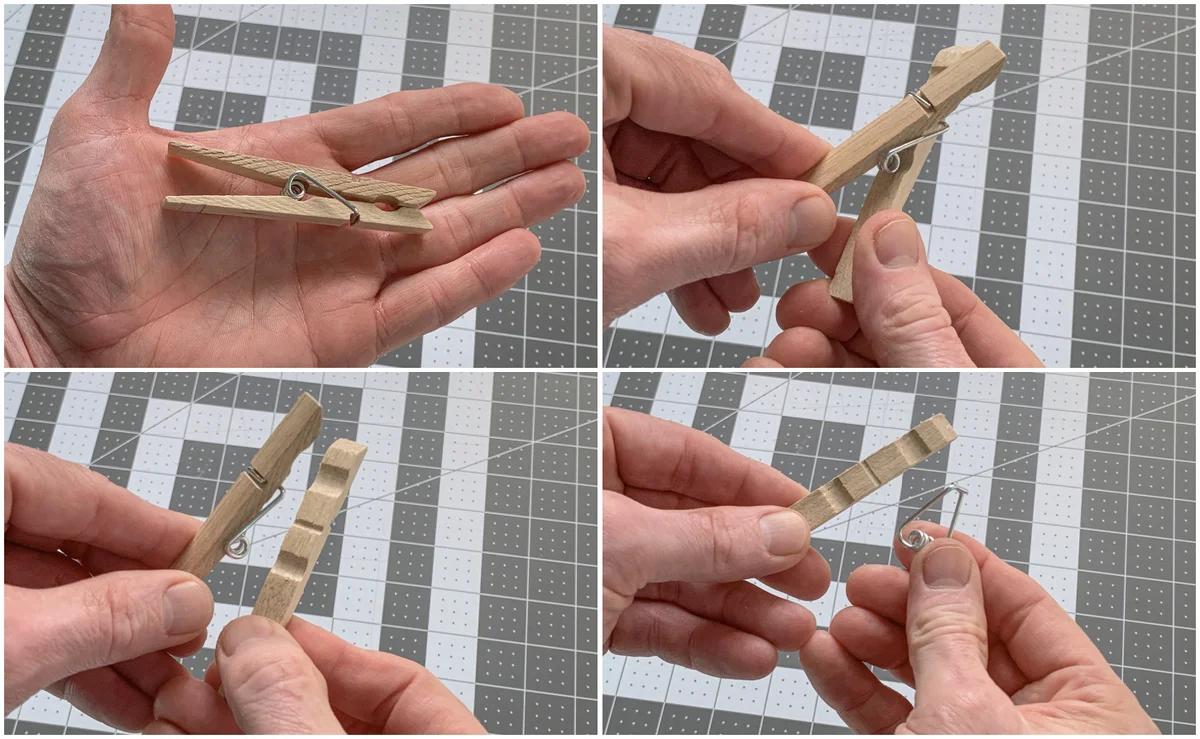
My first mistake was doing a few pins, then starting to glue, then realizing I’d left four springs sitting in a pile next to the work surface. The pins I’d already glued were fine, but the whole layout went off and I had to stop and re-count. Strip all the pins for one butterfly in one go. It takes five minutes and saves the re-do.
Lay the shape out before you glue
Here’s the part I wish someone had told me on the first pass. Don’t start gluing until you’ve laid the bare halves out on the work surface in the butterfly shape you actually want. Arrange the body in the center. Arrange the wings on either side. Step back. Look at it.
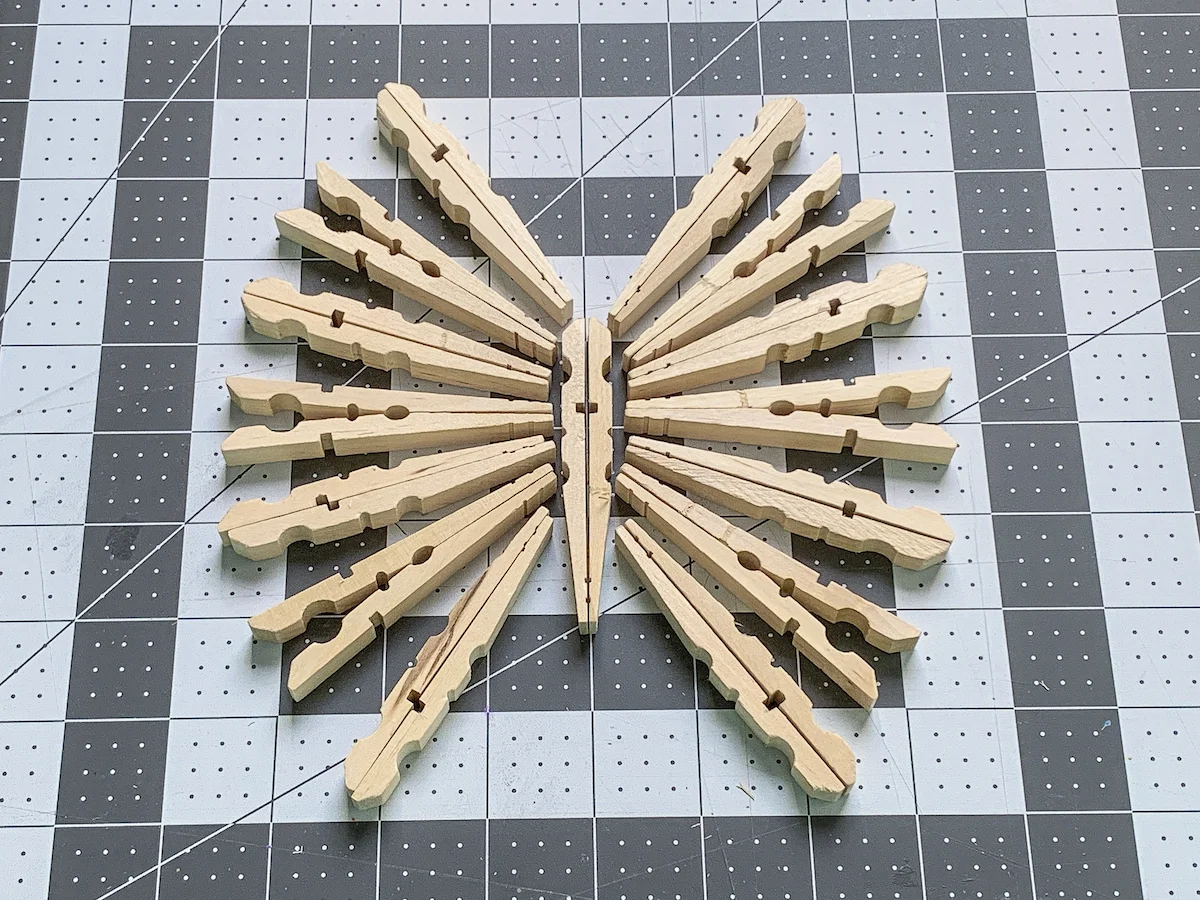
The layout tells you two things. One: how many pins you actually need for the wing shape you want. Two: where the glue joints land, so you know which pins are doing structural work and which are just decoration. I kept a second butterfly half-finished while I worked out the wing angle on the first one, and by the time the first one dried, the layout on the second one came together faster. That’s the point of laying things out — the second pass is where the first pass pays off.
Glue the body, then the wings
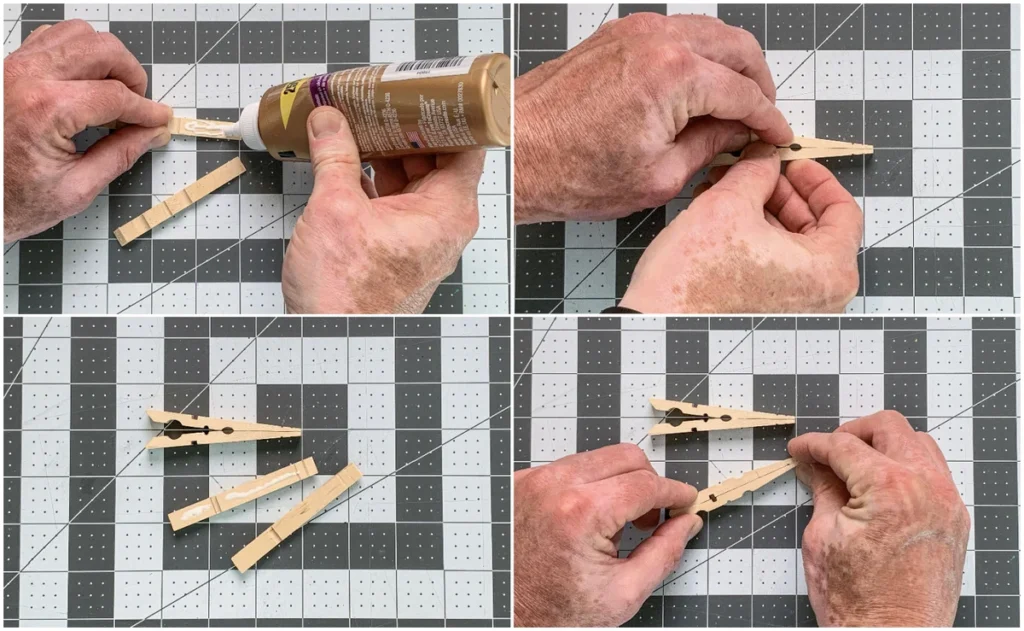
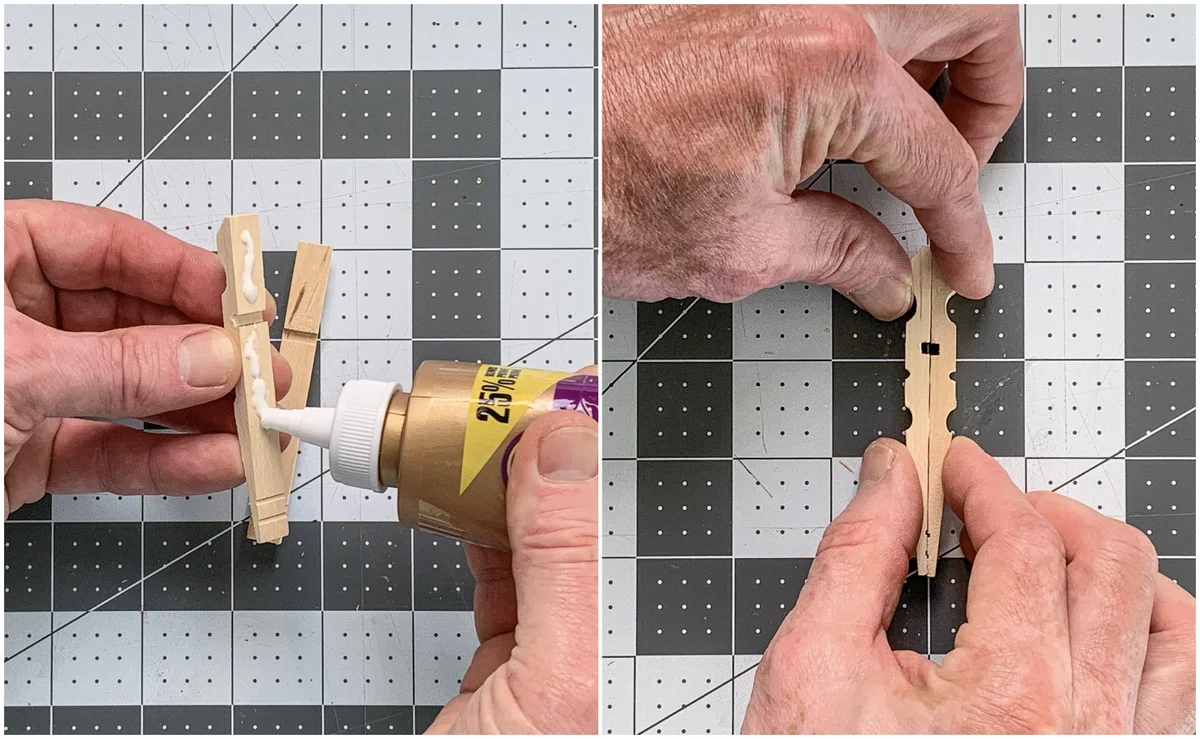
Start with the body. A line of craft glue along the center joint. Hold the pins together for a moment — long enough that you can feel the glue set — then let them dry before you touch the wings. I set the body down on a flat piece of cardboard to keep it level while it dried.
Next, the wings. This is where I went wrong on the first attempt. I tried to glue the wings to the body all in one pass, and the body wasn’t fully dry, so the whole thing skewed to one side while it set. By the time the glue had cured, the left wing sat a few degrees off from the right and I couldn’t talk it back without prying at a fresh joint. My first attempt is in the bin, where it belongs.
The fix is patience. Glue the wings in two pairs — two pins at a time — and let each pair dry before you join the pairs into a full wing. Then, and this is the part that took me longest to learn, don’t attach the wings to the body until the body is completely dry and you can flex it without feeling any give.
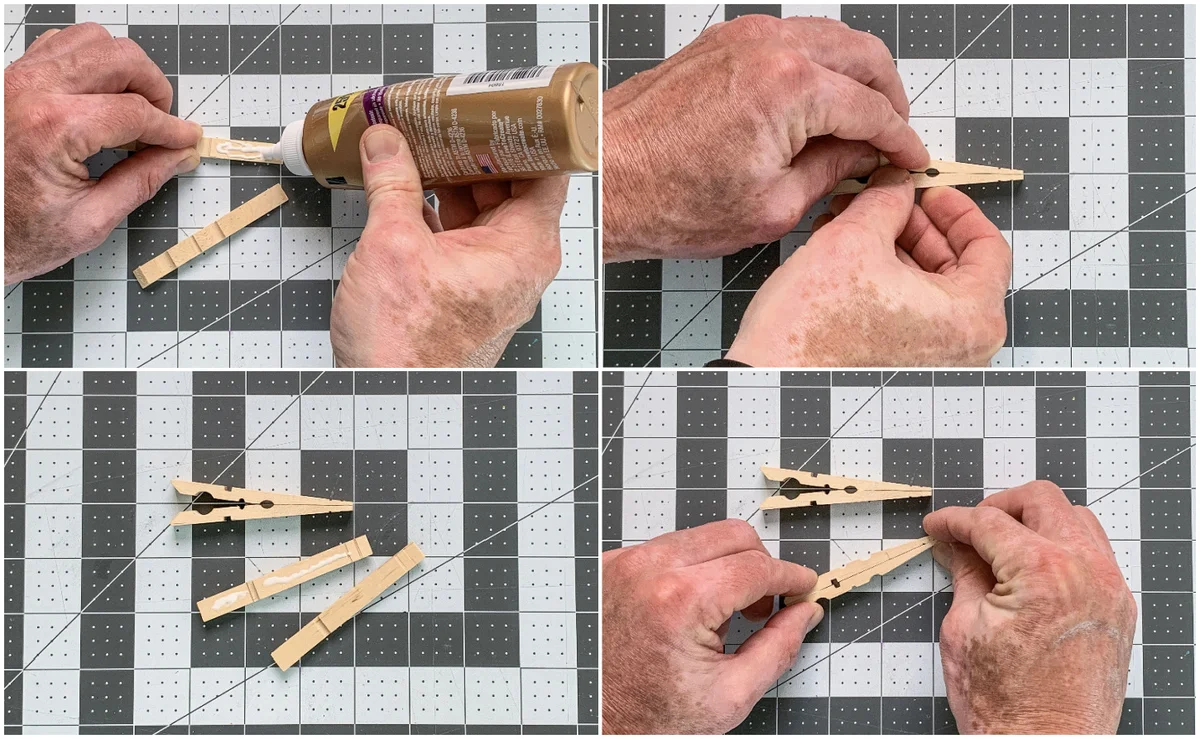
Glue the wing pairs to the body one at a time, hold each joint for a moment, and let it dry before moving to the other side. Slow, but the symmetry holds.
Paint, dots, antennae
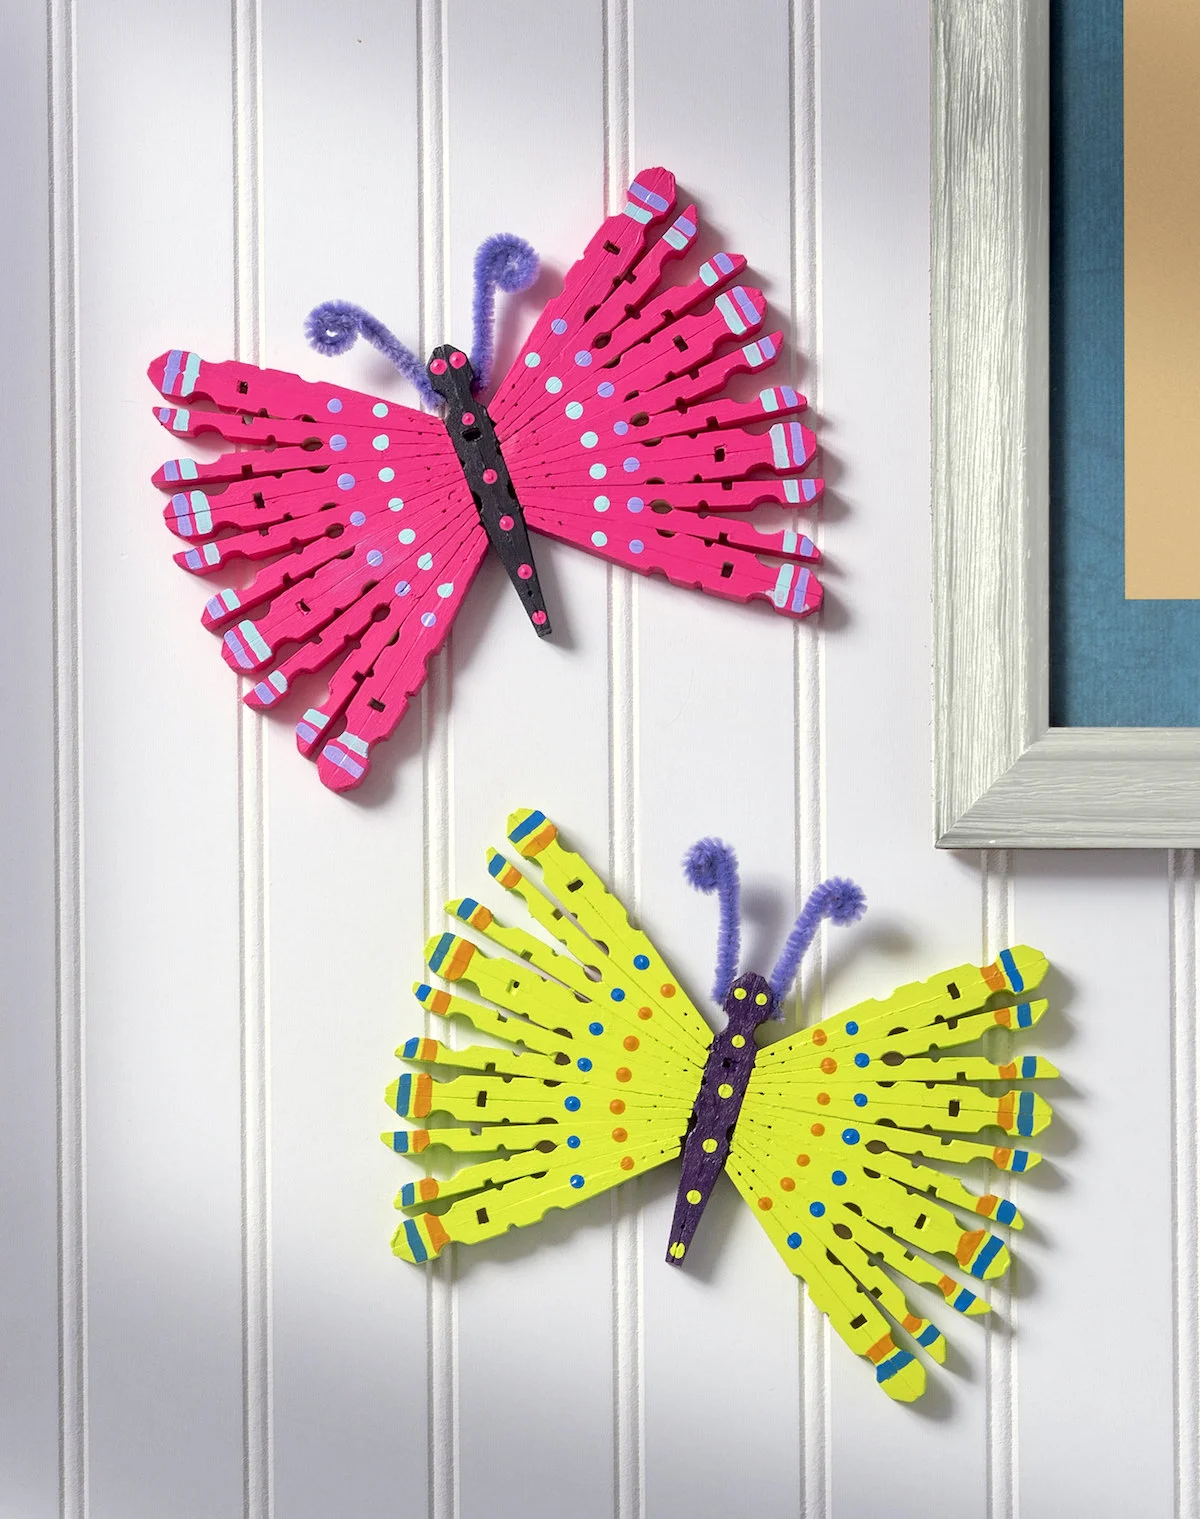
Four colors across the two butterflies. I painted the body in one solid color, then did both wings in a different one, then went in with the small brush for accents on the wing tips.
The dots are the trick that looks harder than it is. Dip the very end of a fine brush in paint, touch the brush tip to the surface, and lift straight up. One press, one dot. No dragging, no pressing hard. Practice on a scrap of card first if you’ve never done it — it takes two or three tries to get the pressure right, and once it clicks, the dots come out clean and even.
Add a few dots to the body too, and let everything dry before you handle the wings.
For the antennae, cut the pipe cleaners in half. Bend each half into a gentle curve, and glue the straight ends to the top of the body, just to the side of where the wings meet. Hold them in place until the glue grabs, then step back and check that the antennae aren’t drooping. If one is, add a tiny bead of glue at the base and press it down again.
The finished butterflies look better on the wall than they do on the workbench. I hung mine at eye level and the difference is obvious — they read as decoration up there, not as half-finished craft projects.
What I’d do differently
Two things. First, I’d strip all the pins for both butterflies before I started gluing either one, so the spring removal doesn’t interrupt the glue rhythm. Second, I’d plan the paint colors before I started gluing, not after the body was already set. I picked the wing color while the glue was still tacky and it showed in the edges.
If you only take one thing from this, make it the dry time. The glue does the work, not your hands. Let it set, check the joint, move on.
Lesson card
Time: 15 minutes of hands-on work per butterfly, plus the dry time — the full build from pins to painted finish ran about 2 hours 45 minutes across the weekend. Cost: $5 for the supplies. Level: beginner — no tools beyond glue, paint, and patience.
That’s the lesson.